Homemade Gluten Free Udon Noodles

October 30, 2021Mrs. Lin's Kitchen
gluten free udon noodles

Learn how to make gluten free udon noodles at home with just 2 easy-to-find ingredients and water.

It can be hard to find thick and chewy gluten free udon noodles that have a texture just like the regular ones. After many trials and errors, I have found the perfect recipe to make gluten free udon noodles at home with just rice flour and tapioca flour.

Making noodles at home sounds like a difficult task but I promise it’s easier than it seems. You can use these udon noodles for any stir-fry or noodle soup recipe. Although freshly made noodles are still the best, they also won’t lose their texture after storing in the refrigerator for a few days.

gluten free udon noodles

Above is the side-by-side comparison between the store-bought regular udon (right) and my homemade gluten free udon (left). The color is slightly different but their texture is surprisingly similar. If you give this recipe a try, let me know if you agree.

Ingredients
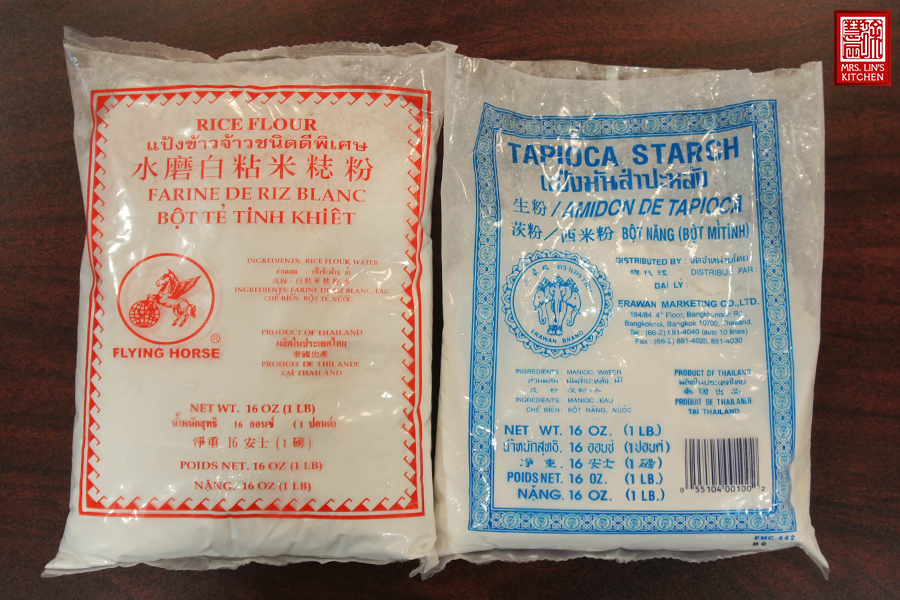
gluten free udon noodles
  • 1-1/4 cup of rice flour
  • 1/4 cup of tapioca flour/starch
  • 1-1/4 cup of water

To pipe out the noodles, I actually got myself a noodle maker and I’m using the 5mm hole to make the udon. This tool helps me save a lot of time. You can also use a potato ricer or just put your dough into a Ziploc or a cake piping bag to form the udon. The hole for the potato ricer is slightly bigger so you will get bigger udon.

Visit My Asian Tablewares Store

View Print Layout
Print Recipe
Close Print

Homemade Gluten Free Udon Noodles

Learn how to make gluten free udon noodles at home with just 2 easy-to-find ingredients and water.

Ingredients

  • 1-1/4 cup rice flour
  • 1/4 cup tapioca flour/starch
  • 1-1/4 cup water

Method

  • 1)

    Mix 3/4 cup of rice flour with 1-1/4 cup of water in a pan or pot of your choice before starting the heat. Make sure all the lumps are dissolved. Once all the lumps are gone, you can start heating at medium-high heat Keep stirring because you don’t want the bottom to burn.

  • 2)

    Turn off the heat when the rice flour mixture becomes gluey. This happens very quickly so make sure you keep an eye on your rice flour. Continue to stir after turning off the heat.

  • 3)

    Next, add the remaining rice flour and the tapioca flour into the pan. Mix well to combine the dry flour with the gluey mixture we created early. At this point, the heat is off. Keep mixing until you see no dry flour left.

  • 4)

    Put the dough into your noodle maker, cake piping bag or potato ricer.

  • 5)

    Bring a pot of water to a boil and prepare an ice-water bath

  • 6)

    When the water starts to boil, slowly pipe the dough into the water to form the noodle strains. The noodles are done once they float to the surface. That’s when you need to remove them from the hot water. Place the noodles into the ice water bath right away to stop the cooking. And you’re done.

Previous Recipe Next Recipe